When you set up Hostinger Titan email on outlook instead of using Titan’s webmail we run into a bit of an issue. Luckily, that’s an easy fix.
Hostinger is a popular web hosting service trusted by thousands of professionals. With that in mind, tutorials using their service should be in abundance, right?
Lucky for me it turned out one thing I really needed wasn’t a common thing I guess.
Hostinger works with Titan to give customers their own business email addresses for free. Meaning you can use an email with your own domain name (ex. firstname@mydomain.com).
Which is great and they make the process as simple as possible. However, using that email with Microsoft Outlook, that’s a different story.
Having a custom business email address is a fantastic way to increase your credibility and professionalism. We’ve created a few for different projects such as our Useless Wisdom podcast.
So let’s jump right in and get you on your way.
How to Set up Hostinger Titan Email on Outlook
In this article, we are laying out a full guide to set up Hostinger Titan email on Outlook.
However, if you want to setup titan email on iPhone / iPad or setup Titan Email on Mac we also have clear and concise guides for that as well.
If you are more of a video person below is a brief step-by-step guide to getting your Titan email address up and running on Microsoft Outlook.
1. Sign-up for Your Free Titan Email
Assuming your web host is Hostinger, log in to your ‘hpanel’ and follow their instructions to set up your free titan email.
If you don’t have Hostinger yet, they are offering 20% off their annual hosting plans.
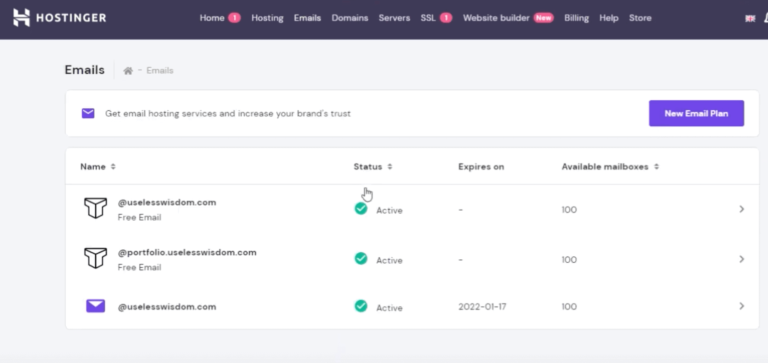
2. Go to Email in Your Hpanel Dashboard
Log into your Hostinger hosting ‘ Hpanel ‘ dashboard and click ‘Emails’ from the top navigation menu.
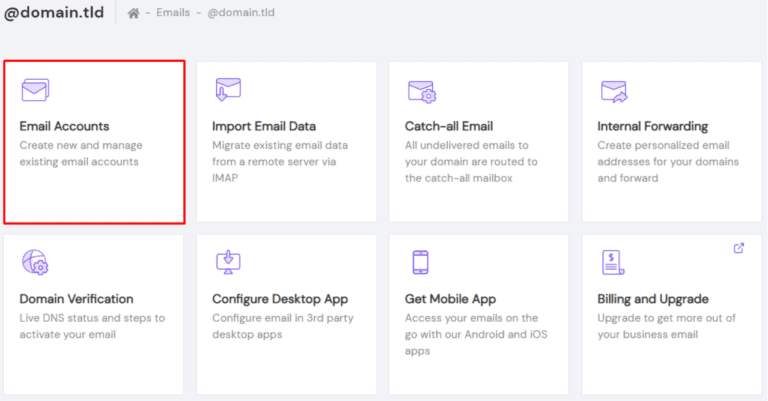
3. Click on the Email You Just Setup
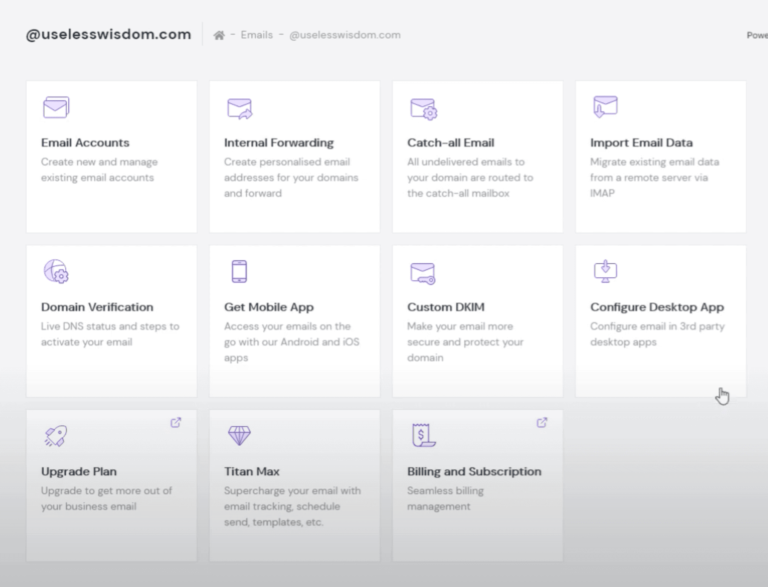
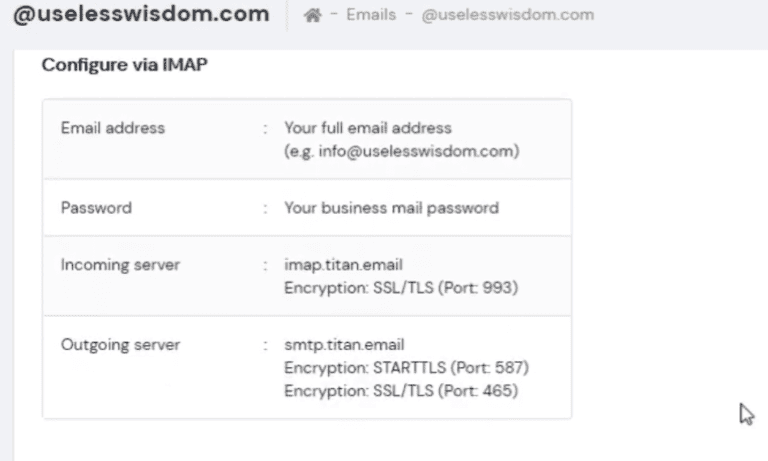
4. Click on 'Configure Desktop App'
Once their click on ‘Configure Desktop App’. You’ll need this information in the following steps. It should look like this.
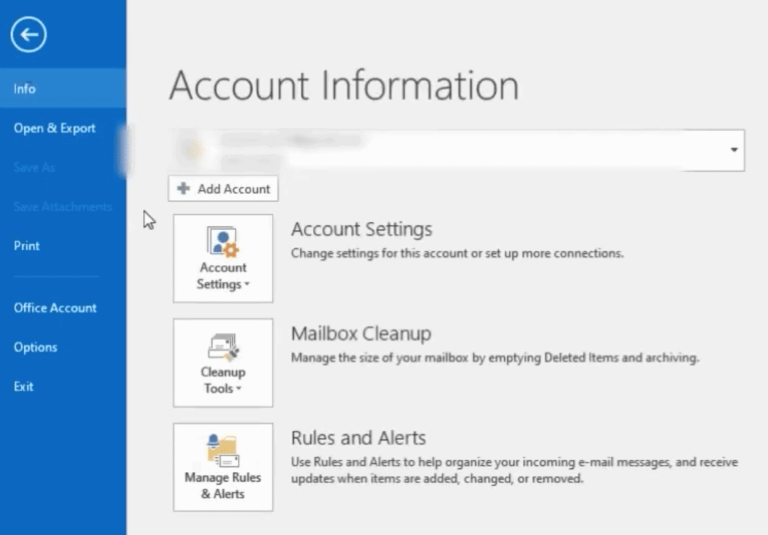
5. Open Outlook and Setup New Account
With Outlook open click ‘file>add account’
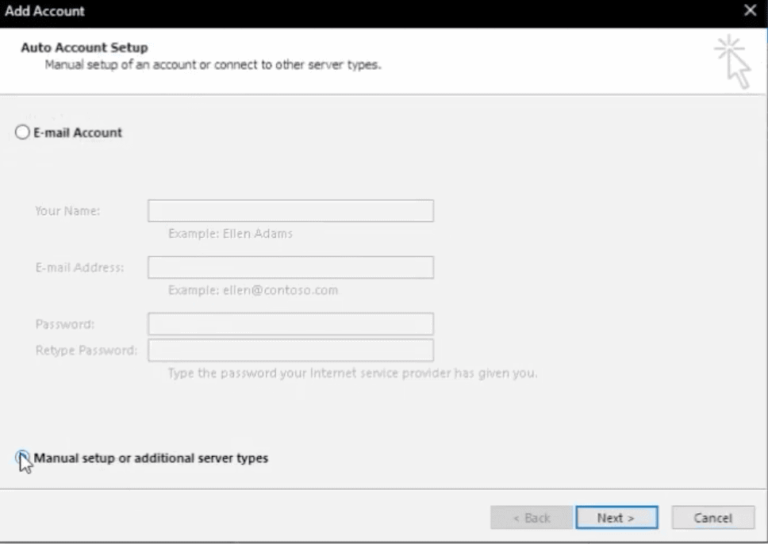
6. Click Manual Setup
This box will pop up, click ‘manual setup’.
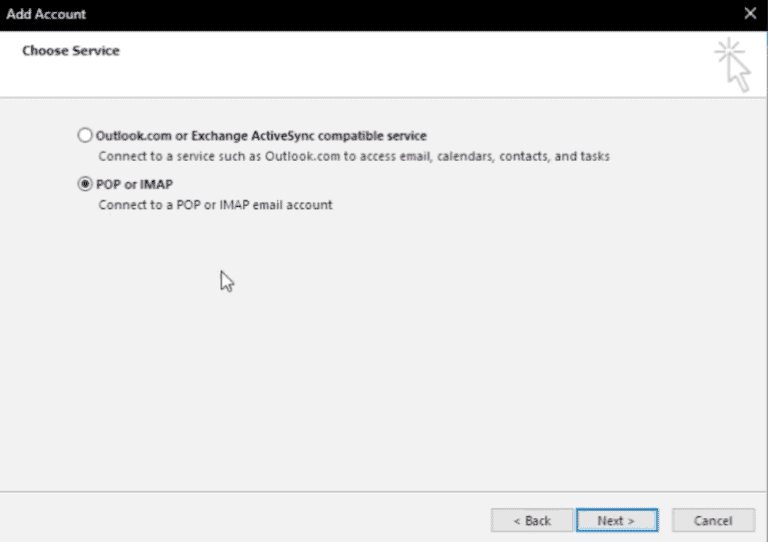
7. Setup Imap on Outlook for Titan Email
After clicking ‘Next’, check the option for ‘Imap’ setup then ‘next’.
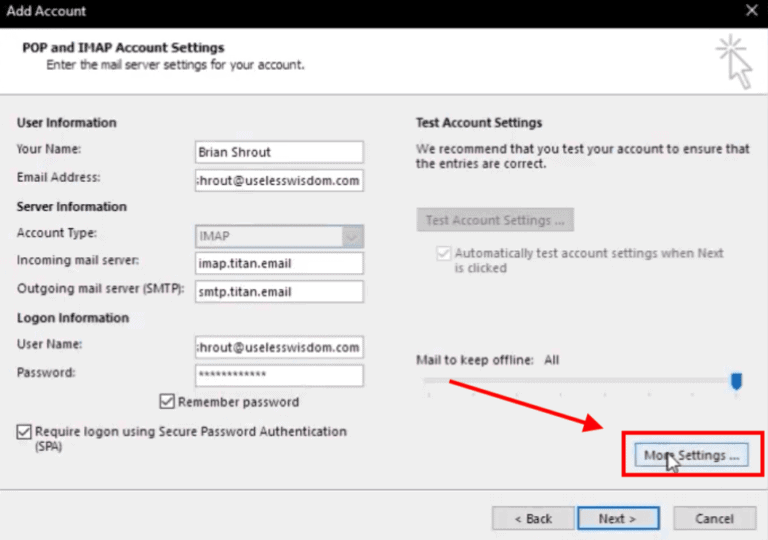
8. Enter Your Titan Email Credentials
Now you are just entering your information for the Titan email address we set up in the first step.
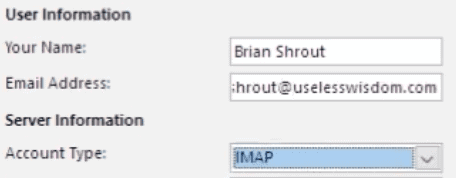
9. Select 'IMAP' from Drop-down and Complete the Following Fields
Now, we will select ‘Imap‘ at the drop-down box and enter the information we found in the 4rth step.
We check the ‘remember password’ box with all of those fields completed.
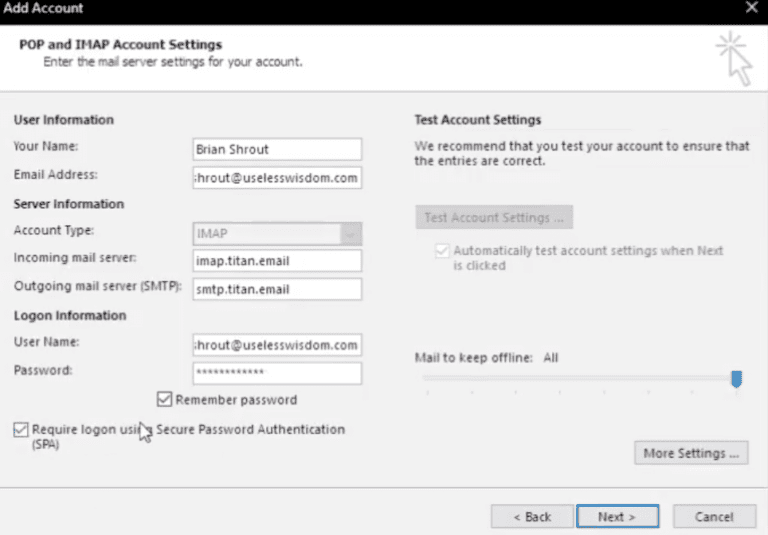
10. Click 'More Settings'
11. Enter Port Information Under the Advanced Tab
After clicking ‘More Settings’ we bring up another pop-up box with 3 tabs (General, Outgoing Server, Advanced).
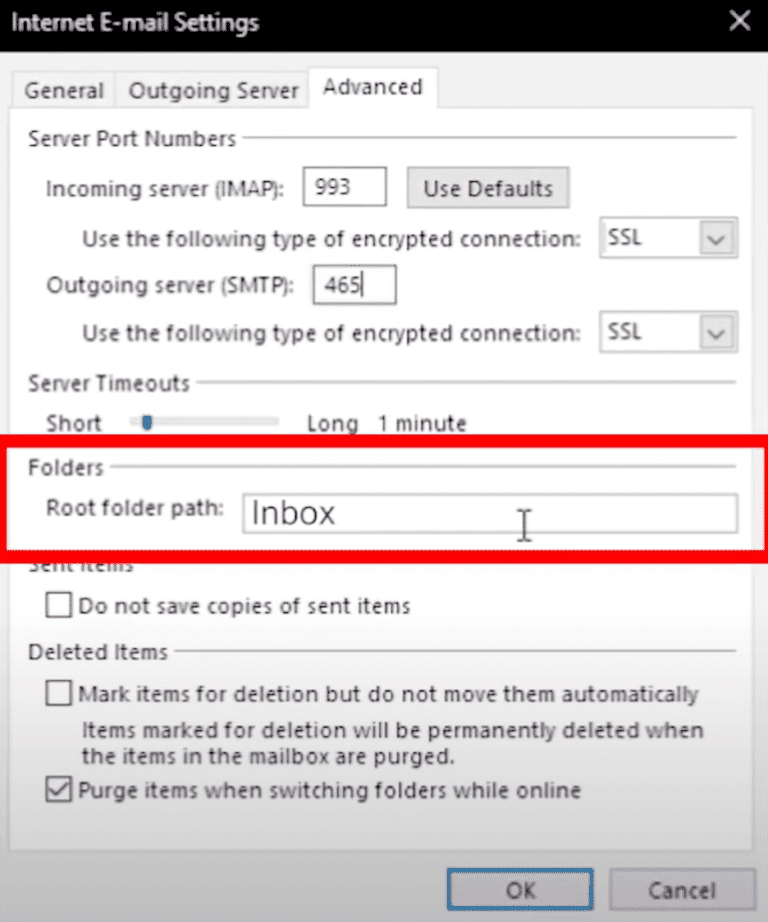
Under the ‘Advanced’ tab, we enter the port numbers we got from step 4 and choose ‘ssl’ from the drop-down box.
Don’t forget to put ” Inbox ” in the root folder field with the ‘I’ capitalized. If you don’t you will not be able to delete emails.
12. Enter Credentials for Outgoing Server Tab
This is the most common thing people forget to do when setting their business email up on Outlook.
Click on the ‘Outgoing Server’ tab, check the box for ‘My outgoing server (smtp) requires authentication’, then ‘log in using’.
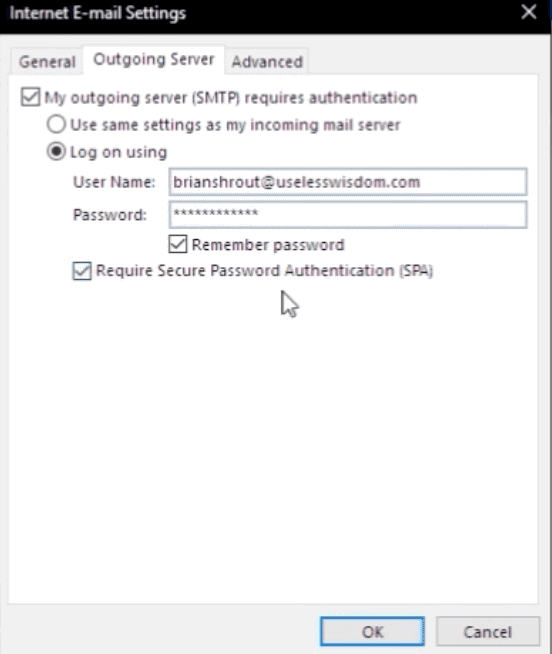
Enter the same credentials as the Titan email you just made.
Before clicking ‘okay’, don’t forget to check the two boxes ‘remember password’ and ‘Require Secure Password Authentication’.
Click ‘Okay’ and click ‘Next’.
That's It!
You have successfully set up Hostinger Titan email on Outlook, and you can now enjoy not being required to use that inconvenient webmail app Titan provides for your mobile devices.
All in all, the setup is pretty simple, but if you haven’t done it before it can be pretty aggravating. Seeing as though there isn’t much information on how to go about this, I’m glad to guide you through it.
Now that you’re all set up, why not save yourself some more time with 5 podcast recording tips to improve your podcast?