Setup Titan Email on iPhone or iPad and it only requires a few easy steps.
Hostinger offers a free email through Titan by signing up for one of their hosting plans. Which sounds like a great deal until you take it, then end up getting confused from lack of documentation.
Luckily, Titan Email is a great client! This article is the only troublesome issue we’ve had which is from the lack of support. Since we didn’t care much for Titan’s phone app or desktop app we consider others probably don’t either.
Although setting this up on an iPhone or iPad isn’t as difficult as setting up Titan email on outlook, it doesn’t mean this isn’t a tedious process. But if you haven’t set up an IMAP email before, it’s not like it’s common knowledge.
If you’ve never heard of Hostinger before, it is a great website hosting service that Useless Wisdom personally uses for our sites.
If you’re in the market for a hosting service with fast speed and great customer service, Hostinger is currently offering 20% off their annual plans for readers of Useless Wisdom.
That being said let’s jump into it.
Setup Titan Email on iPhone or iPad
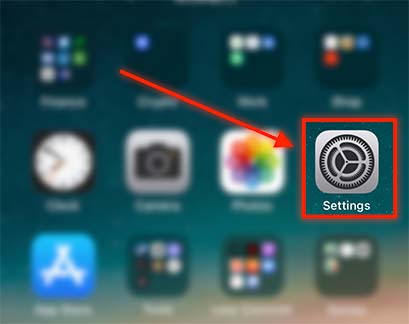
1. Navigate to your 'Settings'
Open your settings app.
Depending on your homescreen’s layout, it may be there or if you’re having trouble finding your settings app – tap, hold, and swipe down from the top half of your screen and search for ‘settings’.
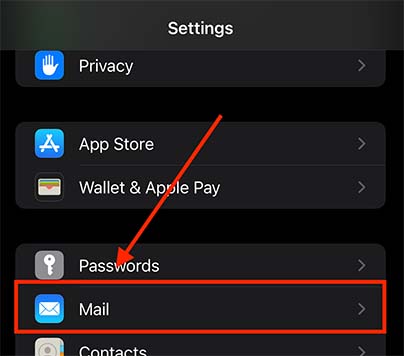
2. Scroll down and Click on 'Mail'
Slowly scroll down through your options and look for ‘Mail’. Tap on ‘Mail’.
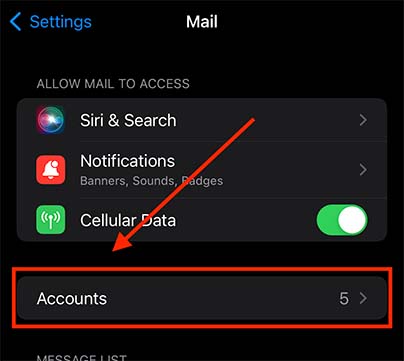
3. Click on 'Accounts'
On the next screen, tap on ‘Accounts’ below ‘Cellular Data’.
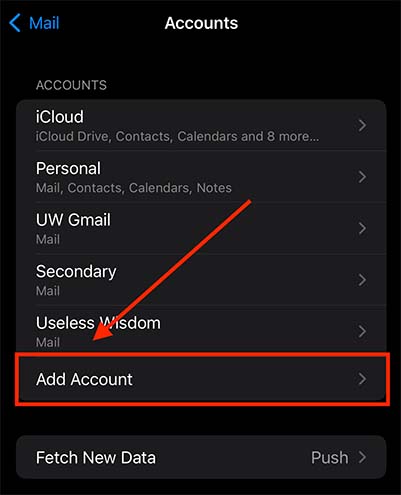
4. Click on 'Add Account'
The next screen will have all of your current email accounts you’ve setup on your phone.
Tap on ‘Add Account’.
5. Click on 'Other'
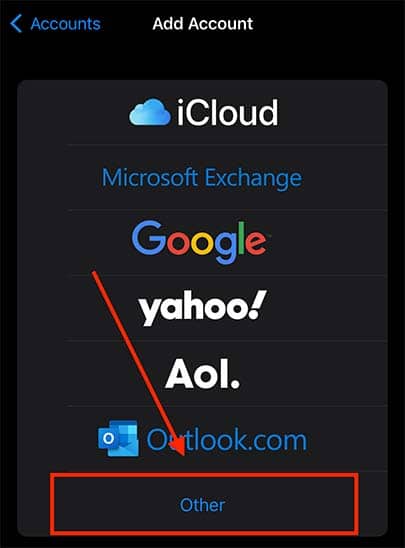
The next screen provides you with a list of server options you may use for email accounts.
Since we are setting up Titan Mail, tap on ‘Other’.
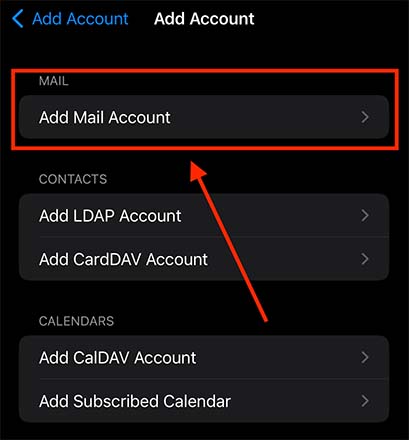
6. Click 'Add Mail Account'
On the next screen, tap ‘Add Mail Account’
7. Enter your Titan Email Credentials
Once selecting the option to add a mail account, you will see 4 fields that need filled out. Here we will enter our Titan Mail credentials.
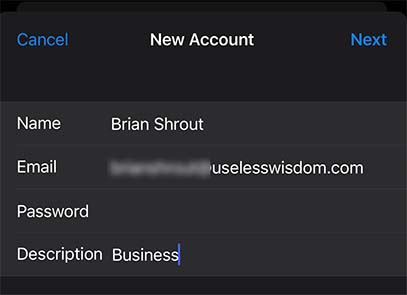
- Name – Enter the name you want to show up in the ‘From’ field of sent emails.
- Email & Password – These will be the credentials you choose when you set up your Titan Mail account.
- Description – This will be the label you want to choose for your mailbox to keep them organized.
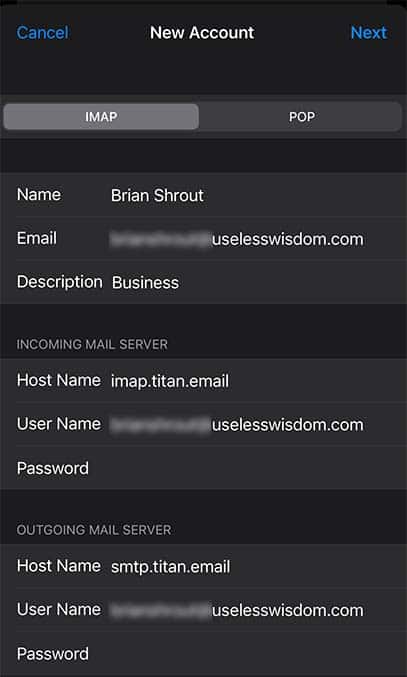
8. Enter the IMAP information for your Titan Account
After entering your credentials and tapping ‘Next’, it’s time to fill out the IMAP information for your Titan Email address.
*Note: Be sure to enter your email and password in both the incoming and outgoing mail server fields.
| Field | Input |
|---|---|
| Incoming Mail Server | imap.titan.email |
| Outgoing Mail Server | smtp.titan.email |
9. Sync Email Account with Mail
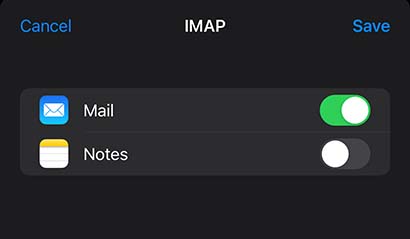
After entering your IMAP settings and tapping ‘Next’, the next screen is asking you to select the apps you would like to sync with this account.
In this example, we just ensure ‘Mail’ is checked.
Testing your New Business Email
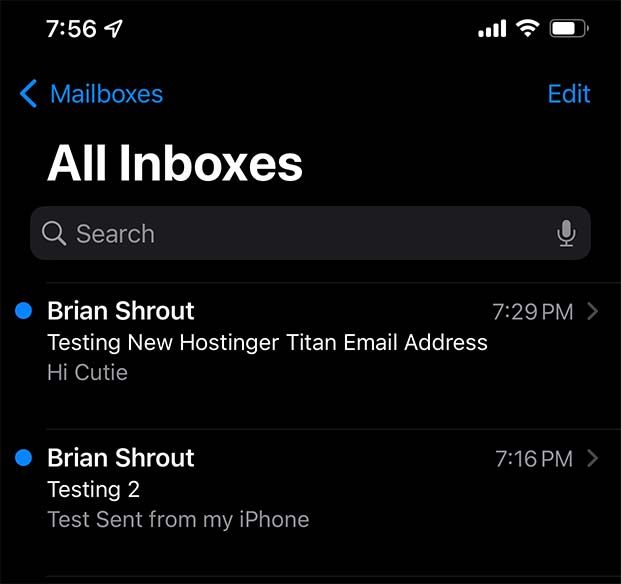
The last and arguably most important step is left. Testing our new email to ensure everything is up and running.
You can do this by simply emailing ourselves and emailing a separate account of ours.
Final Thoughts on Setting up Titan Email on iPhone or iPad
You have successfully finished setting up Titan Email on iPhone! However, remember that this method will remain the same if you are setting up Titan Email on iPad as well.
If, like me, iCloud didn’t automatically tranfer your Titan Mail account to your Mac, we have a seperate guide on how to setup Titan Email on Mac


