Suppose you’re running self-hosted services on a server like TrueNAS or Proxmox, such as Overseerr, Nextcloud, Jellyfin, Sonarr, Radarr, and other similar applications. In that case, you might encounter issues accessing these services after setting up a reverse proxy via their external URLs while within your network. This is a common problem due to something called ‘NAT Hairpinning’.
What is NAT Hairpinning?
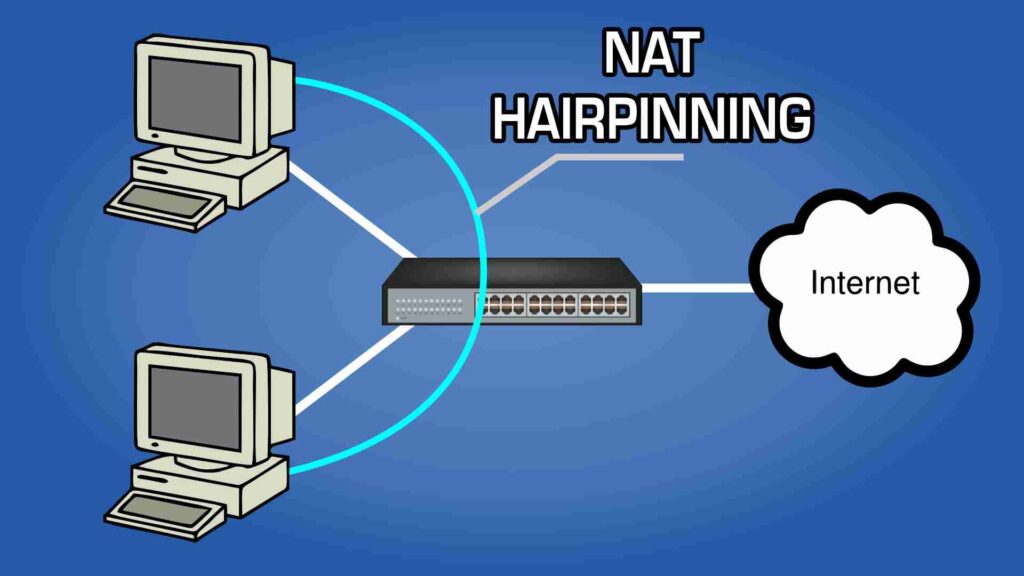
NAT Hairpinning, also known as NAT loopback, is a network configuration that allows an internal device to communicate with another device on the same network using an external IP address. Many routers do not support NAT Hairpinning by default. This will breed issues when you try to access your self-hosted services through their external URLs while you’re connected to your local network. Now that we understand what the problem is, we can work towards fixing it.
How to Fix NAT Hairpinning
To resolve this issue, we will be using a combination of a self-hosted DNS provider like Pi-hole and a reverse proxy manager such as Nginx Proxy Manager. These tools help reroute requests correctly, ensuring smooth internal and external access to your services.
Prerequisites
- DNS Provider: Pi-hole or similar (this tutorial will focus on the use of Pi-hole).
- If you haven’t set up Pi-hole yet, here is a great step-by-step guide to set it up using docker-compose. If you prefer to use Portainer, use this guide.
- Reverse Proxy: Nginx Proxy Manager or similar. You likely have this set up already to access your internal self-hosted services externally.
With the prerequisites out of the way, let’s move on to the meat and potatoes of this process and ensure we get them configured properly.
Step-by-Step Guide
Step 1: Adding DNS Record in Pi-Hole
- Access Pi-hole:
- Open your Pi-hole admin interface.
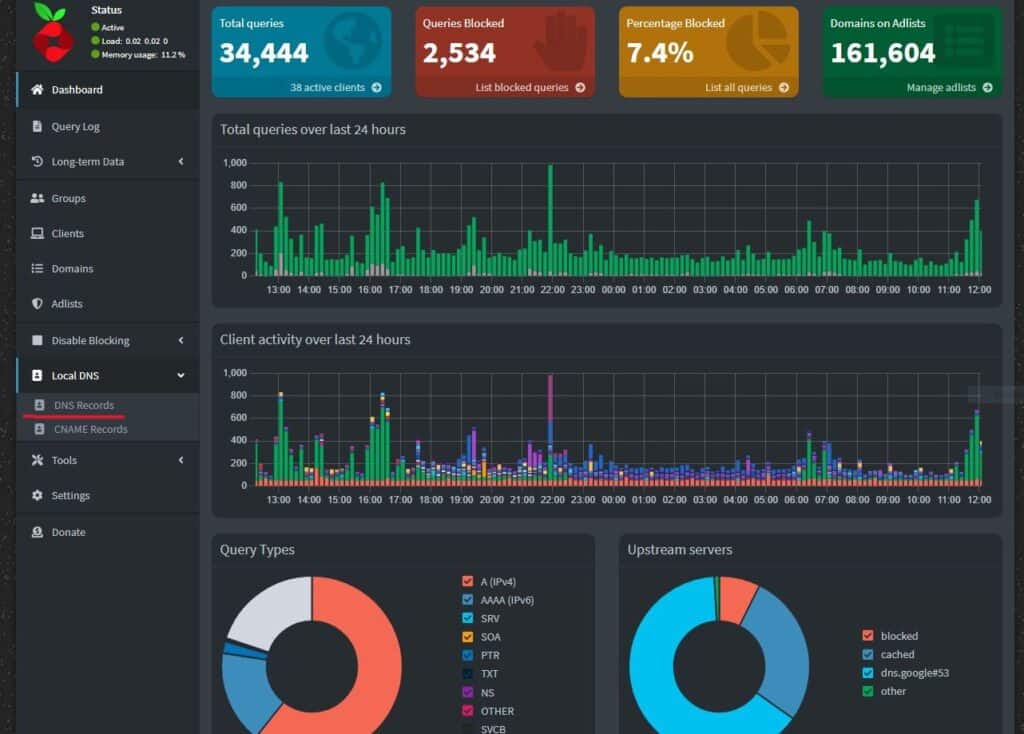
- Navigate to Local DNS Records:
- Go to the ‘Local DNS’ section.
- Click on ‘DNS Records’.

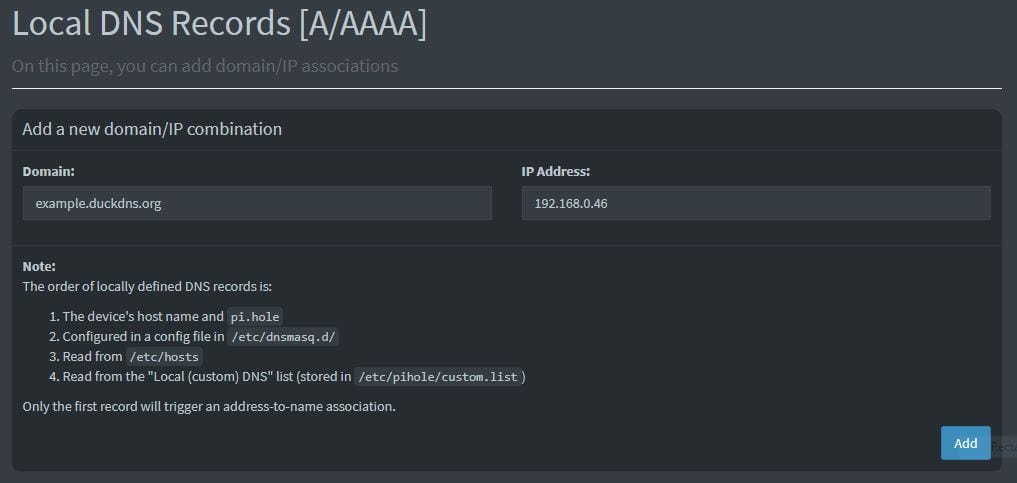
- Add a DNS Record:
- In the ‘Domain’ field, enter the external domain you cannot access internally (e.g.,
example.duckdns.org). - In the ‘IP Address’ field, enter the internal IP address of your Nginx Proxy Manager instance.
- Click ‘Add’ to save the record.
- In the ‘Domain’ field, enter the external domain you cannot access internally (e.g.,

Step 2: Verifying Proxy Host in Nginx Proxy Manager
Since you already have Nginx Proxy Manager set up to handle external requests to your internal services, we will just be ensuring it’s directing the requests correctly.
If this is your first time using Nginx Proxy Manager, here is an excellent guide explaining how to use it.
- Verify Nginx Setup:
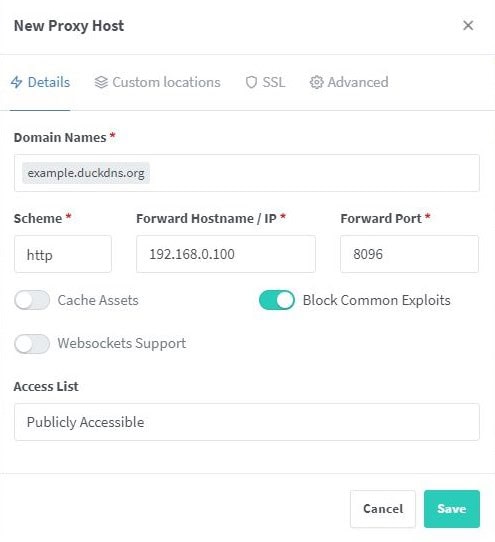
- Ensure Nginx Proxy Manager is configured to forward requests from your domain (e.g.,
example.duckdns.org) to the appropriate internal IP and port for each of your services. - This setup ensures that any request, whether internal or external, is routed correctly to the intended service.
- Ensure Nginx Proxy Manager is configured to forward requests from your domain (e.g.,

Example Configuration
Let’s say your domain is example.duckdns.org, and you want to access Jellyfin running on an internal IP 192.168.0.100 on port 8096.
- Pi-hole Configuration:
- Domain:
example.duckdns.org - Nginx Proxy Manager’s IP Address:
192.168.0.50
- Domain:
- Nginx Proxy Manager Configuration:
- Create a proxy host entry for
example.duckdns.orgpointing to192.168.0.100:8096.- (This should be previously set up if you were already accessing this service from outside your network. So in that case you should just be ensuring that your inputs are correct.)
- Create a proxy host entry for

By following these steps, Pi-hole will reroute requests to example.duckdns.org within your network to the internal IP of your Nginx Proxy Manager. Nginx Proxy Manager will then direct the request to the correct service based on its configuration.
Conclusion
By configuring Pi-hole for local DNS and ensuring your Nginx Proxy Manager is correctly set up, you can solve the NAT Hairpinning issue. This setup allows you to access your self-hosted services smoothly from both inside and outside your network.
Implementing these steps not only fixes the connectivity issue but also provides a more robust and reliable network configuration for your self-hosted services. Enjoy seamless access to all your applications without the hassle of NAT Hairpinning complications.


